amplify studioを触ってみた

re:invent 2021で発表のあったamplify studioを触ってみました。
概要としては、figmaというサービスと連携し
GUIベースでコンポーネントを
作成できるようになったようです。
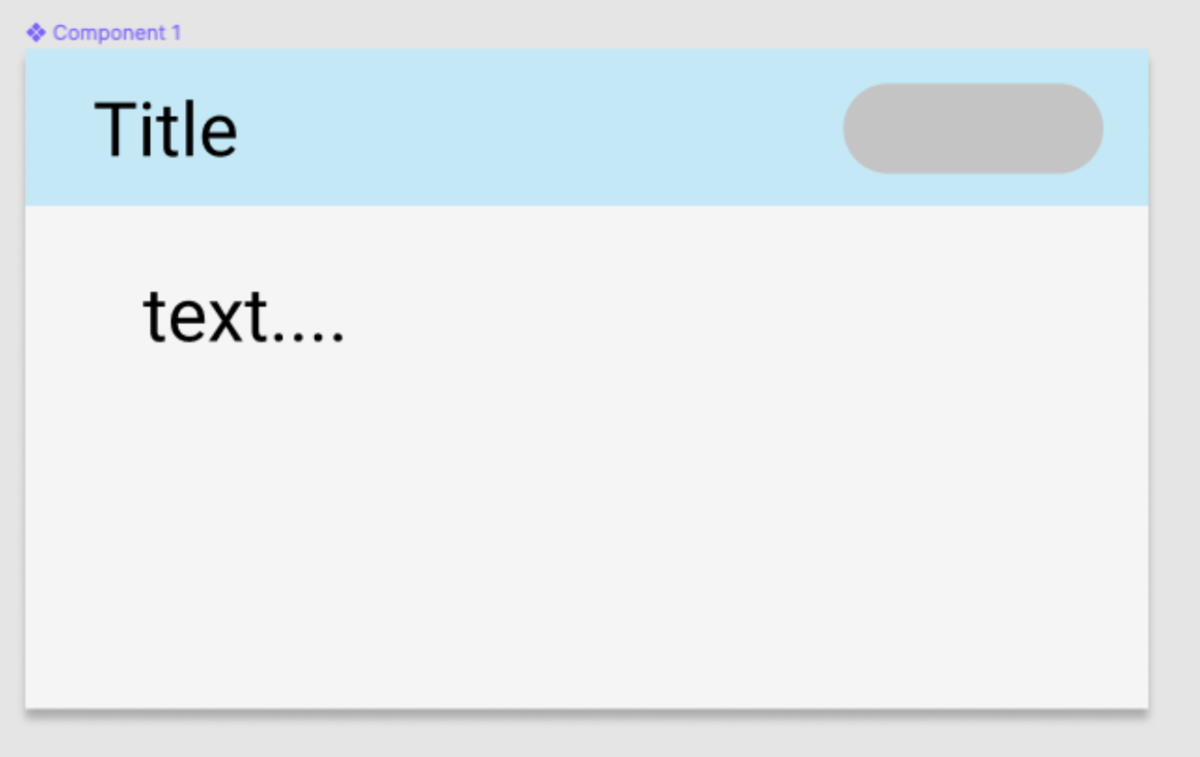
今回は試しにカードのcomponetを作ってみました
figmaでアカウント作成
まずはfigmaでアカウント作成し UI figma kitを利用可能なよう設定します。 www.figma.com

figmaで適当なコンポーネントを作成
figmaで適当なコンポーネントを作成してみます。
figma上でコンポーネント化しておくことで
amplify側にコンポーネントとして連携できるようになるようなので
自分が作成したいコンポーネントが出来上がったら
create componetしておくと良いと思います。

figmaとamplifyを連携
コンポーネントを作成したら、
それをamplify側に持ってきます。
awsコンソールから、
amplify studio ( 旧名 amplify admin UI)を有効化し
amplify studioにログインしておきます
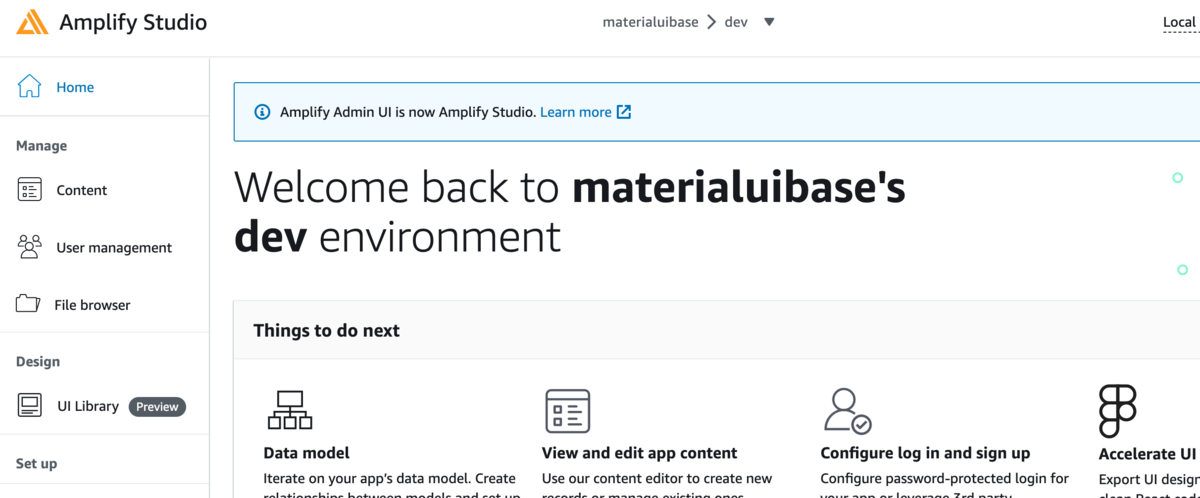
UI Libraryが追加されていますので選択します。
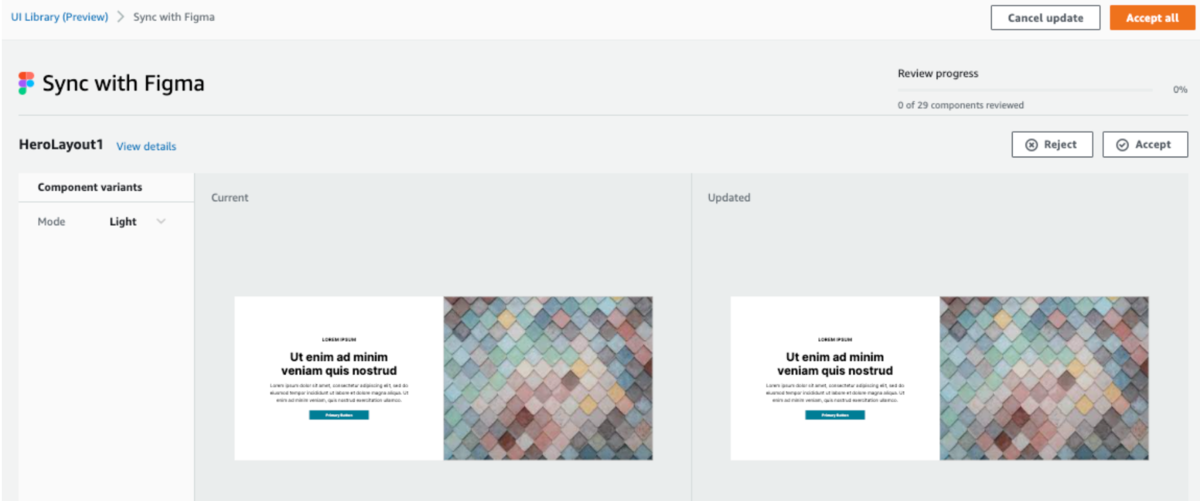
 そしてfigmaと連携するために、
figmaでURLを取得し、Amplify側に入力します。
そしてfigmaと連携するために、
figmaでURLを取得し、Amplify側に入力します。

初期でサンプルで作成されているコンポーネントも含めて
連携するかどうかを聞かれますので、
必要に応じてRejectかAcceptを選択します
あとはamplifyでamplify pullすれば
上記で作成したコンポーネントのコードが
自動作成されダウンロードされます。
実際に作成されたコード
内部が気になったのでコードを見てみました。
@aws-amplify/ui-react自体がText等のコンポーネントを持っており、
propsで、位置等の情報を指定可能なよう作成されているようでした。
/***************************************************************************
 * The contents of this file were generated with Amplify FrontendManager.           *
 * Please refrain from making any modifications to this file.              *
 * Any changes to this file will be overwritten when running amplify pull. *
 **************************************************************************/

/* eslint-disable */
import React from "react";
import { getOverrideProps } from "@aws-amplify/ui-react/internal";
import { Icon, Text, View } from "@aws-amplify/ui-react";
export default function Component1(props) {
  const { Title, text, overrides: overridesProp, ...rest } = props;
  const overrides = { ...overridesProp };
  return (
    <View
      width="449px"
      padding="0px 0px 0px 0px"
      position="relative"
      height="264px"
      {...rest}
      {...getOverrideProps(overrides, "View")}
    >
      <View
        padding="0px 0px 0px 0px"
        backgroundColor="rgba(245.00000059604645,245.00000059604645,245.00000059604645,1)"
        top="0px"
        left="0px"
        width="449px"
        position="absolute"
        height="264px"
        {...getOverrideProps(overrides, "View.View[0]")}
      ></View>
      <View
        padding="0px 0px 0px 0px"
        backgroundColor="rgba(25.999998450279236,188.00003439188004,254.00000005960464,0.2199999988079071)"
        top="0px"
        left="0px"
        width="449px"
        position="absolute"
        height="63px"
        {...getOverrideProps(overrides, "View.View[1]")}
      ></View>
      <Icon
        pathData="M96 19C96 29.4934 74.5097 38 48 38C21.4903 38 0 29.4934 0 19C0 8.50659 21.4903 0 48 0C74.5097 0 96 8.50659 96 19Z"
        viewBox={{ minX: 0, minY: 0, width: 96, height: 38 }}
        color="rgba(174.00000482797623,179.000004529953,183.00000429153442,1)"
        top="12px"
        left="339px"
        width="96px"
        position="absolute"
        height="38px"
        {...getOverrideProps(overrides, "View.Icon[0]")}
      ></Icon>
      <Text
        padding="0px 0px 0px 0px"
        color="rgba(0,0,0,1)"
        textAlign="left"
        display="flex"
        justifyContent="flex-start"
        fontFamily="Roboto"
        top="15px"
        left="27px"
        fontSize="30px"
        lineHeight="35.15625px"
        position="absolute"
        fontWeight="400"
        direction="column"
        children="Title"
        {...getOverrideProps(overrides, "View.Text[0]")}
      ></Text>
      <Text
        padding="0px 0px 0px 0px"
        color="rgba(0,0,0,1)"
        textAlign="left"
        display="flex"
        justifyContent="flex-start"
        fontFamily="Roboto"
        top="89px"
        left="47px"
        fontSize="30px"
        lineHeight="35.15625px"
        position="absolute"
        fontWeight="400"
        direction="column"
        children="text...."
        {...getOverrideProps(overrides, "View.Text[1]")}
      ></Text>
    </View>
  );
}
こちらのコードは上書きしたとしても、
再度amplify pullをすると上書きされてしまうようです。
ドキュメントをみると、上書きされたくないなら、
適当にrenameして管理すればできると書かれていました。
https://docs.amplify.aws/console/uibuilder/override/
Amplify studioでコンポーネントを操作してみる
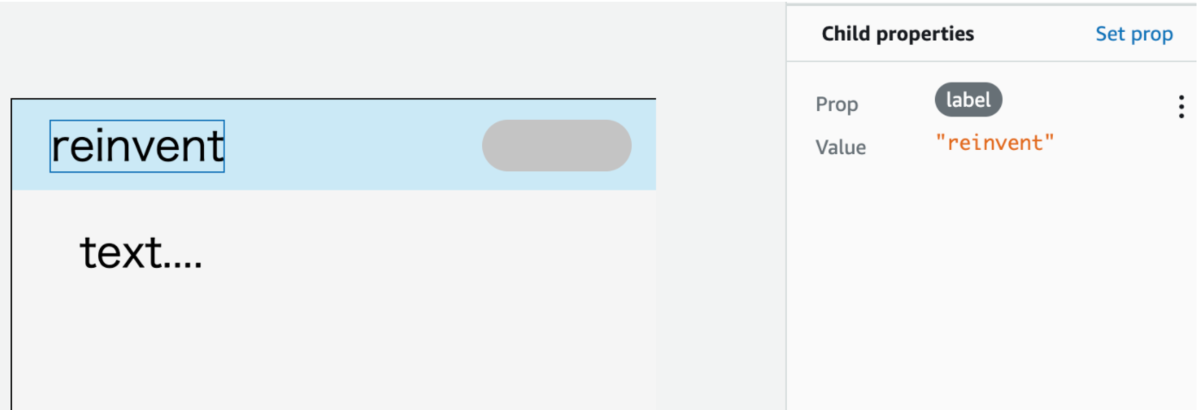
Amplify studioを利用してPropsを
指定できるようなので試してみました。
例えば、子要素のtextで、labelを与えることで
テキスト表示を変えることができました。
また、条件によってpropsを変えることもできるようです。
例えば親コンポーネントに与えたプロパティtypeの値がnotificationの場合は
backgroundColorを青にする
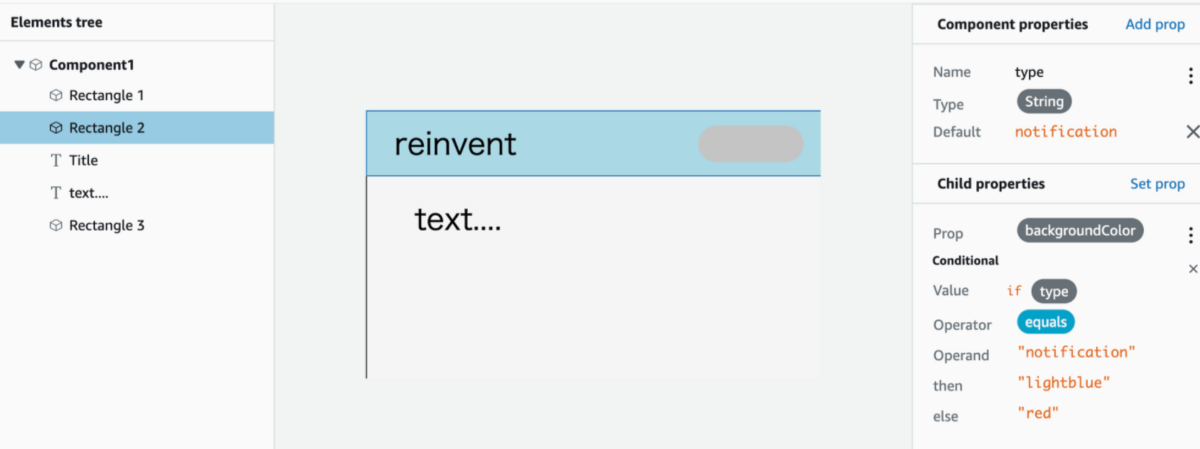
それ以外(alert)だったら赤にする
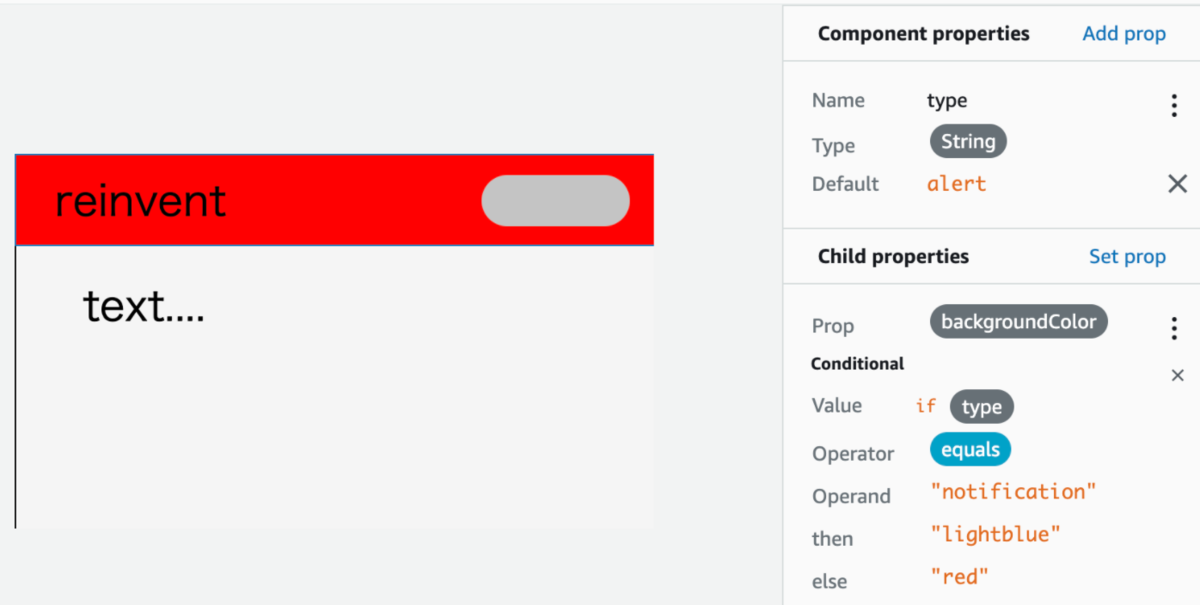
といった設定も可能なようでした。
やってみて
正直なところ私はfigmaが初めてで、若干GUI部分の操作に戸惑いました。
ただ、figmaに慣れれば、割と感覚的に
作業できるようになるのかと思いました。
またamplifyはreinvent前にもupdateが多くあったり
amplify studioにも、他にも機能があるようなので、
引き続き使ってみて記事書ければと思います。
最近のAmplify Updatesを紹介するTweetを連投します!
— Jaga@Amplify (@jagaimogmog) 2021年11月25日
疑問やツッコミあれば気軽にリプください🙏#AWSAmplifyJP